

JMeter – Logging Into Salesforce for Automated Testing
by Patrick Connelly posted on June 29, 2017

I’ve written quite a few web services in Salesforce, and I’ve written about them a couple of times. And my love of testing is pretty well known. One thing that’s always been a problem is testing the web services in an automated fashion as a real consumer would. I’ve talked about manually testing them with SoapUI before, and while useful doesn’t fit into an automated process well. So let’s jump into the world of JMeter and how we can automate our web service testing for Salesforce.
Why JMeter?
Honestly, I chose JMeter because that’s what our QA person was already using. I know that SoapUI can do some of this but I’m going with what our team already has experience with. Also, I know that Jenkins has a JMeter plugin and that’s important later down the line as part of the fully view of the code.
The Basics
This is the first time I’ve done anything with JMeter and it was pretty easy to set up. Just following the instructions got me up and running (on my Linux machine) in a couple of minutes.
DISCLAIMER: The way this is being done may not be the best way to do it. All I know is that it doesn’t appear horribly hacky and it works. If it breaks, you get the pieces.
Credentials
Since the idea for this is to be able to run these on the command-line and to be checked into git, we don’t want to store any credentials in the tests. And, since these are going to run on the same Jenkins box that does our Solenopsis deploys, we have credentials in a properties file that we can use.
url=https://login.salesforce.com
username=username@example.com.sandbox
password=thisisapassword
token=abcd123456
Example credential file
JMeter Setup
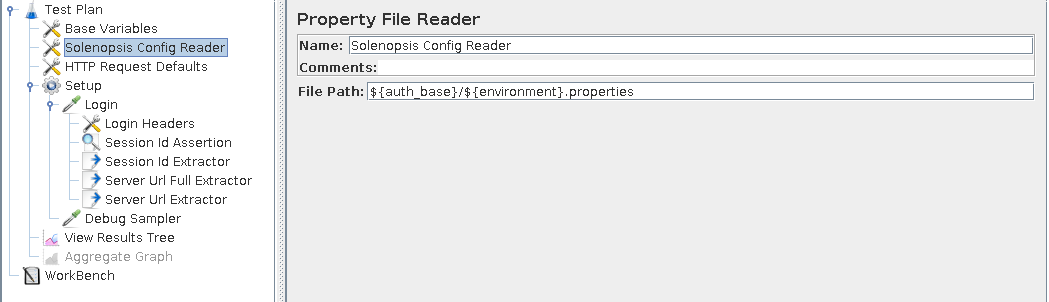
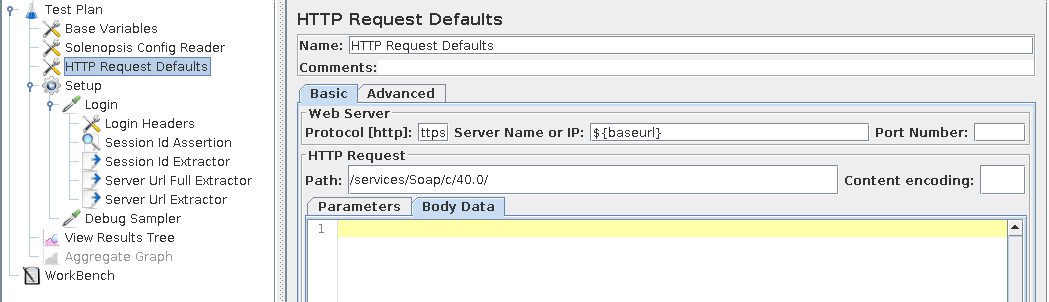
We’ll start with a new Test Plan and pull our credentials out of the properties file. To do this, we’ll need to install a property reader plugin first. Now we’ll have our JMeter pull in this file and set up our base http requests.
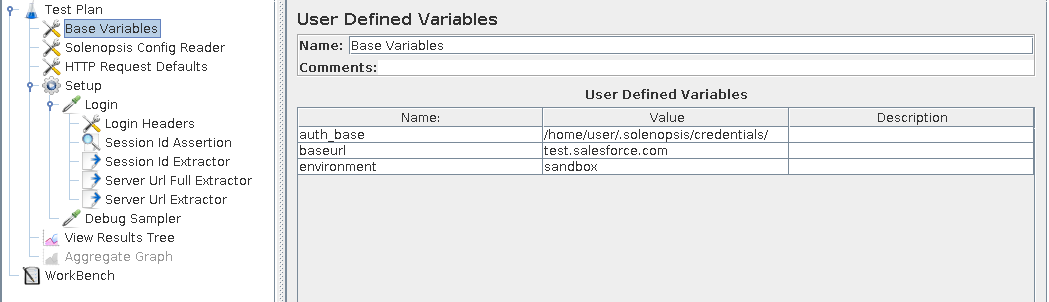
This will now set up all the environment variables we need to start the login process
Logging In
Now that we have our variables imported we’ll create a new setUp thread and a HTTP request processor
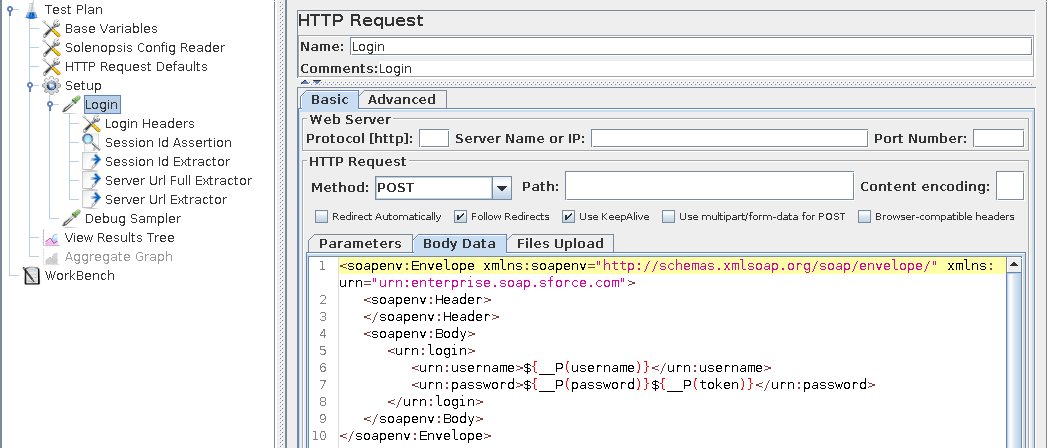
Here we put in our soap login request with our credentials from the properties file. The text version is available below
<soapenv:Envelope
  xmlns:soapenv="http://schemas.xmlsoap.org/soap/envelope/"
  xmlns:urn="urn:enterprise.soap.sforce.com">
    <soapenv:Header></soapenv:Header>
    <soapenv:Body>
        <urn:login>
            <urn:username>${__P(username)}</urn:username>
            <urn:password>${__P(password)}${__P(token)}</urn:password>
        </urn:login>
    </soapenv:Body>
</soapenv:Envelope>
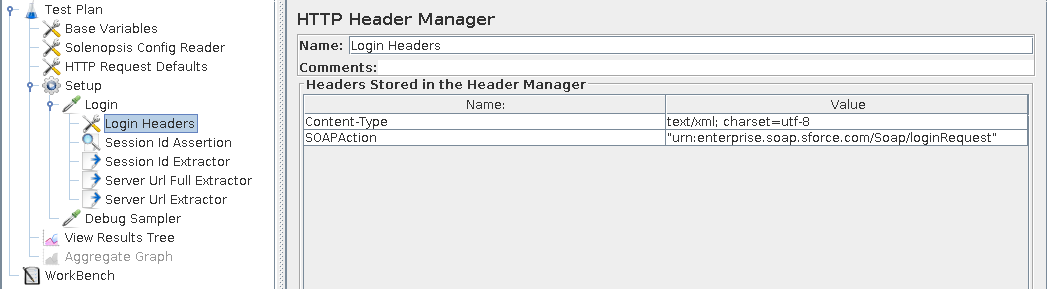
And we’ll need to set the login headers to tell that we are using a SOAPAction of "urn:enterprise.soap.sforce.com/Soap/loginRequest"
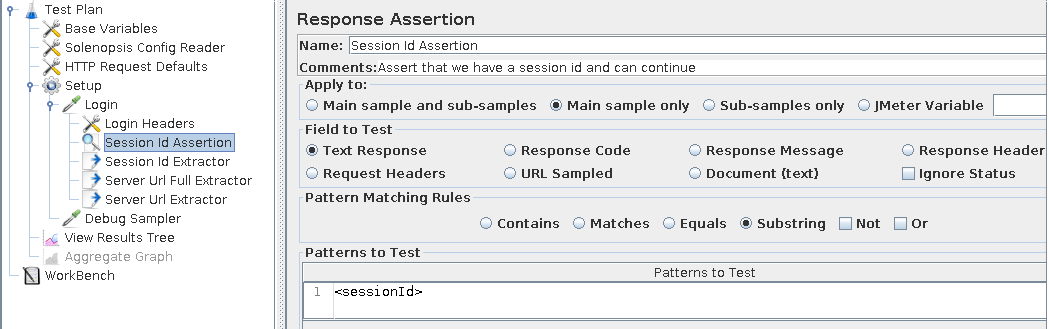
Now we need to make sure that we’ve successfully logged in by doing an assertion that the session id is in our response
Storing Session Id
Now that we’ve logged in, we need to get our session id and our server url into variables so we can use it later to test other webservices
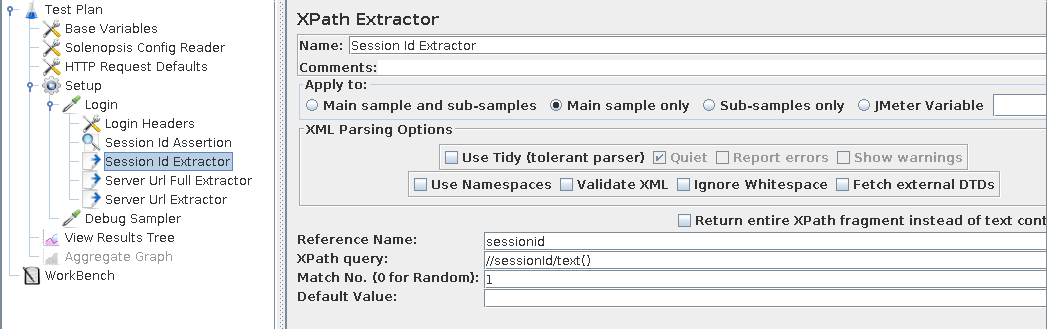
Getting the session id is super easy and is just a normal XPath of //sessionId/text()
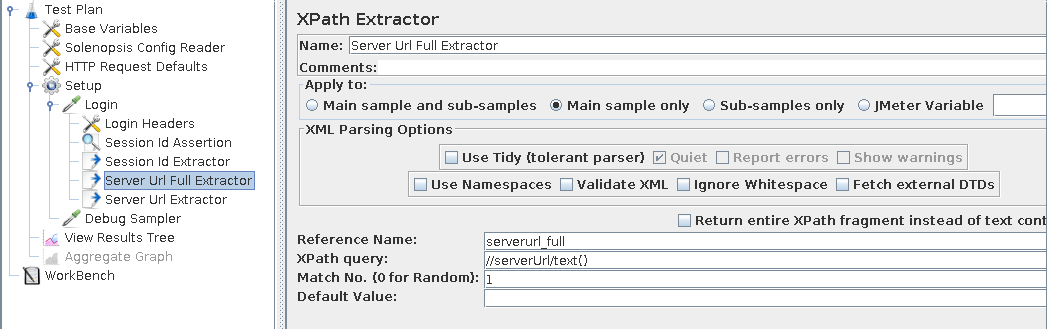
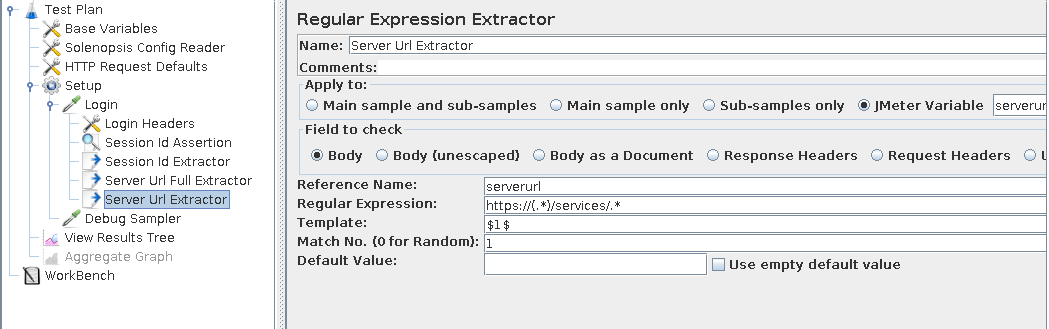
Getting the server url is a bit harder. Unfortunately you cannot put in the protocol as part of the URL for making HTTP requests. Because of this we need to get the server URL out with the XPath of //serverUrl/text() and then use regex of https://(.*)/services/.* and store group $1$ into our serverurl variable
Conclusion
Now that we have the serverurl and the sessionid we can make calls into the standard or custom SOAP and REST APIs and setting the server name to the serverurl value and passing in the sessionid as an Authorization Bearer