

Postman – Logging in to Salesforce
by Patrick Connelly posted on August 08, 2017
We’ve been slowly replacing all of our SOAP endpoints with REST endpoints inside of Salesforce. The upside of this is that they are much easier to use. The downside is that they are harder to functionally test without a bunch of work to generate session Ids. (This was made even more frustrating by a recent change that obfuscates out the session id in debug logs) So, I decided to figure out how to run a Postman request that would then store the session id and server url for later requests to use. This post will cover how to set that up and use this one request. I plan on writing more in-depth blog later about how to use Postman to test custom REST endpoints later.
Environment Setup
In Postman, you can have multiple environments that store key/value pairs of data. This is super useful when you have multiple sandboxes / orgs to log into. For this setup, we’ll need four bits of data.
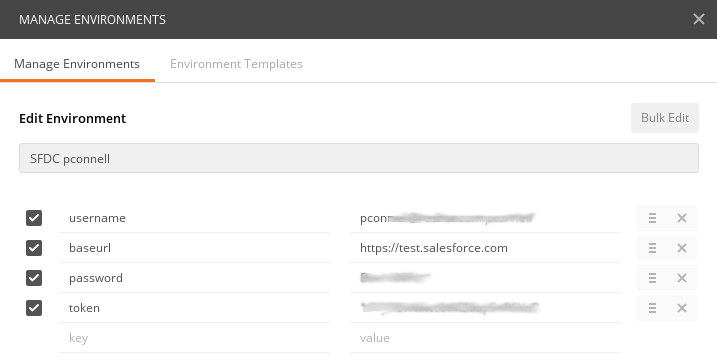
These all should be pretty self-explanatory
- username – The Salesforce username
- baseurl – The url that is used to login. This should be either
https://test.salesforce.comorhttps://login.salesforce.com - password – The password for the user
- token – The token for the user. This may not be required depending on your whitelist settings.
Importing the Collection into Postman
There are two ways to do this. The easiest it to go to collection -> Import -> Import From Link and put in the URL below
https://www.getpostman.com/collections/e3549555892d61e228ac
Alternately you follow the URL above and copy / paste that into Collection -> Import -> Paste Raw Text
Using the collection
Once you’ve imported it, you should have a new collection called “Salesforce” with a POST request called “Login.” Click on it and it will load up the request. Click send and you’re all logged in. You can verify that it’s working by clicking the eye icon next to the environment name and checking for three new variables.
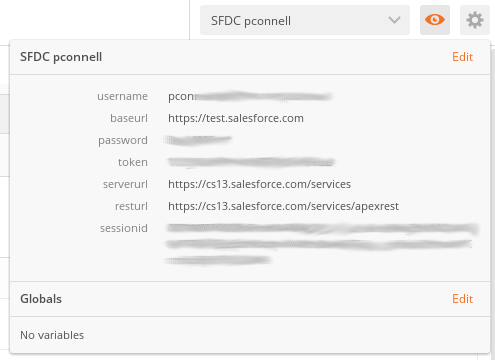
These new variables are
- sessionid – This is the session id you want to pass as part of your Authorization header
- serverurl – This is the base services URL you’d use for making standard REST calls
- resturl – This is a “helper” URL that makes it a bit easier to make custom REST calls
Once you’ve run this and they are stored in your environment, you can make any other REST requests you need. You’ll just use or in your request URL and then add an Authorization: Bearer header to your request.
Example
Let’s say we have a custom REST service that exposes an HTTP GET endpoint with the following code
@RestResource(urlMapping = '/mycustomendpoint'
global with sharing class REST_CustomEndpoint {
    @HttpGet
    global static String getEndpoint() {
        return 'Hello World';
    }
}
To access this in Postman we’d create a request that looks like this
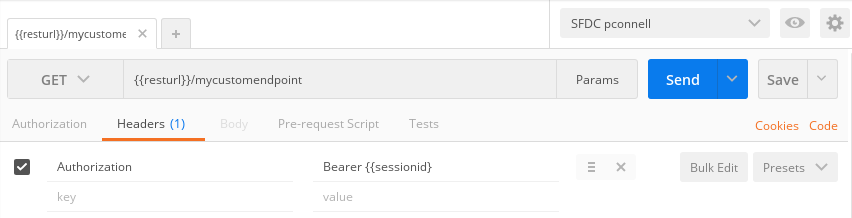
Then after we click “Send” we’ll get the “Hello World” string back from our REST endpoint.