OBS and Zoom - Live streaming to Zoom with multiple cameras
by Patrick Connelly posted on May 18, 2020
One of the hardest things about doing instructional content virtually is when you have to show things that are not on a screen. This came to be an issue for my father when he needed to teach the art merit badge for the Boy Scouts this summer. While lots of the work for the merit badge can be done via a presentation, there is still quite a lot that either has to be done in “meat space” or benefits greatly from being done in a tangible way. The scout camp he is working with this summer is doing all of their merit badge classes over Zoom and with the power of the open source application OBS we were able to give him a more professional setup without spending thousands of dollars or hiring a full-time video crew.
The Problem
The biggest hurdle we needed to face while preparing for this was that switching between cameras and presentation mode in Zoom is a bit clunky and can lead to downtime. And as anyone who’s ever been in a lengthy meeting knows, downtime is a killer and it’s doubly so when presenting to teenagers. What we needed was a way to seamlessly switch between several different “scenes” in a way that would not interrupt the flow of the meeting.
The Hardware
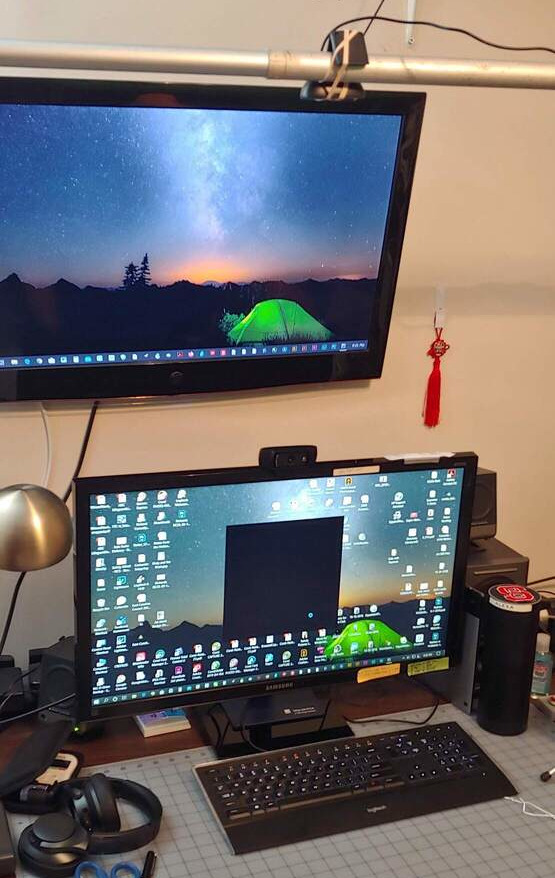
This part was both the easiest and the hardest part of the whole setup. Because of the large influx of people having to work remotely the supply of good webcams is fairly limited. Fortunately my father already had a webcam and I was able to lend him one of mine so we could have a two independent cameras and we were able to set up a top-down camera to allow for demonstrations of various art techniques. This camera was attached to an aluminum pole that is part of a photographic backdrop kit. This was super handy since it can stretch the whole width of the desk and adds a very rigid surface for the camera to mount to.

Enter OBS
If you’ve never heard of OBS, it wouldn’t surprise me. If you’ve not done any live streaming then the likelihood of running across OBS is pretty small. OBS is an open source application that allows you to set up complex views with multiple inputs that can be static or dynamic and allows you to switch between these views while presenting a single output point.
OBS Scenes
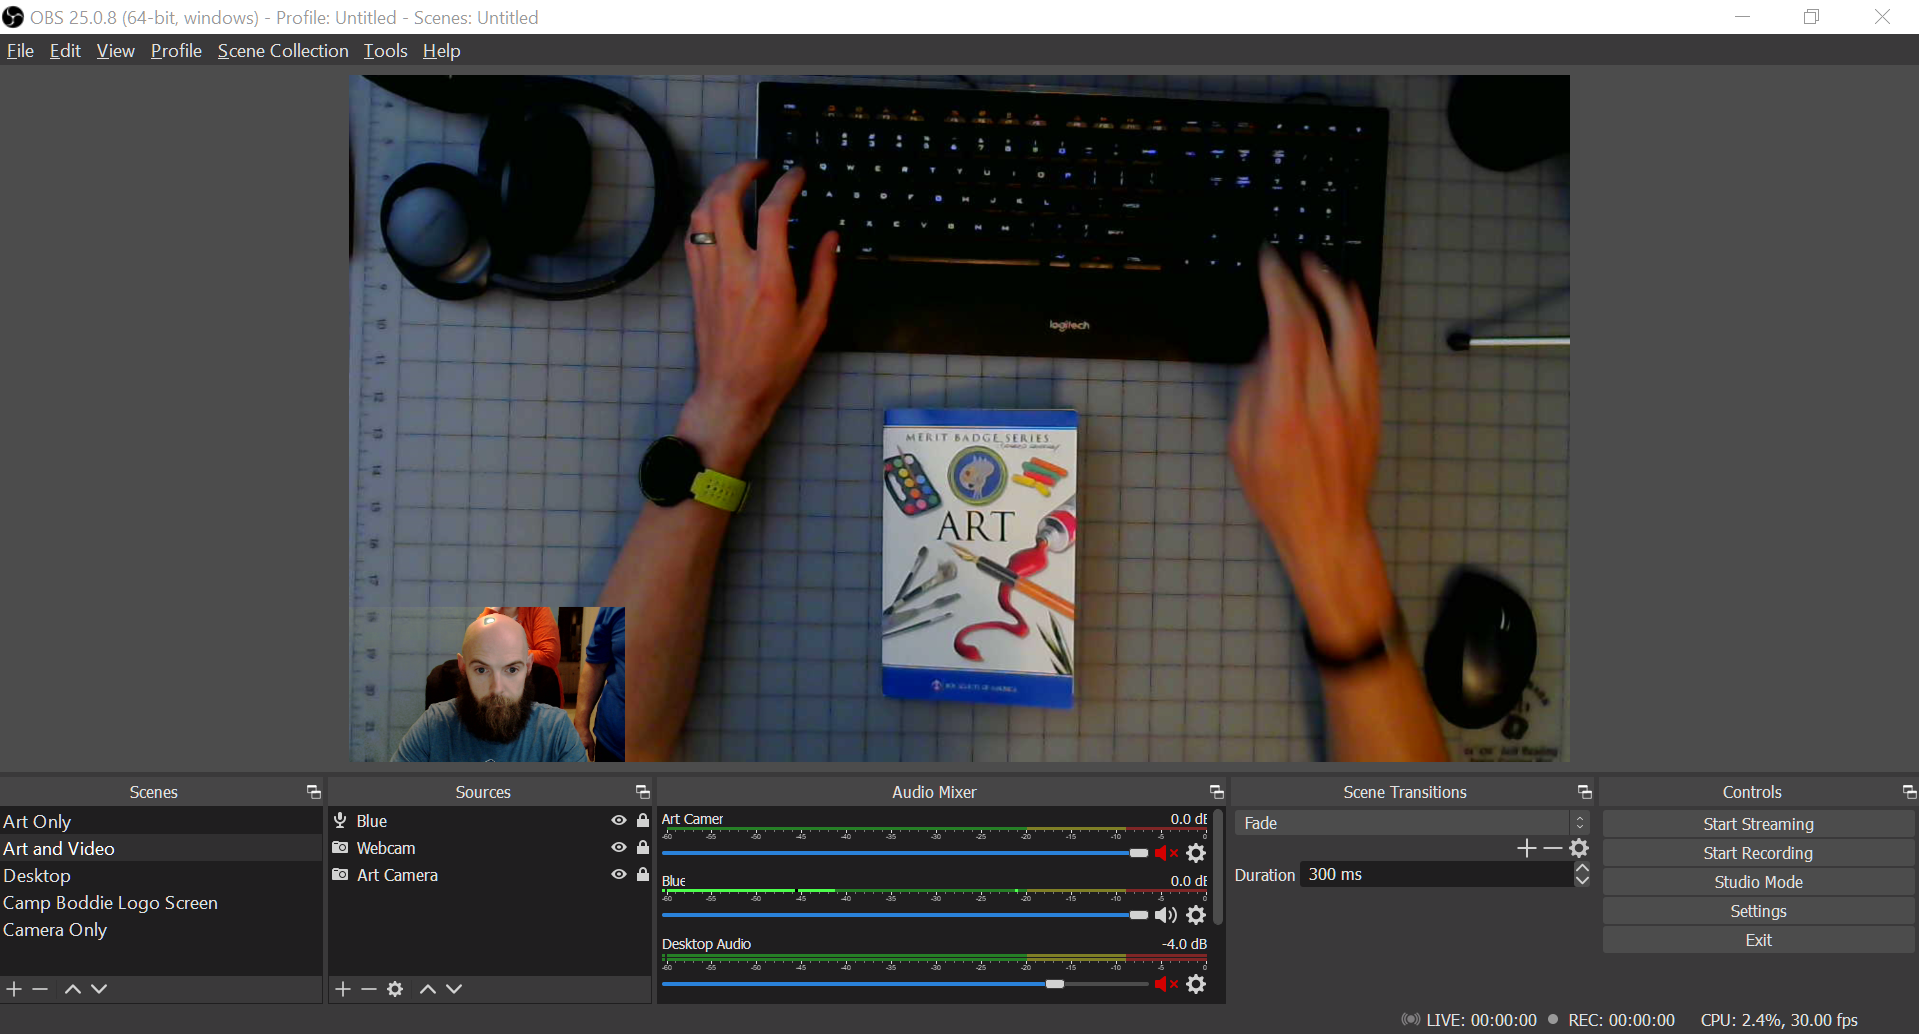
For the class we broke down what we would need to show the scouts and it came down to the following four views
- Presenter Camera - This is a simple full screen view from a front facing webcam that will be used when not presenting and just talking to the audience.
- Presentation - This is another simple full screen view of just the presentation slides being presented to the audience.
- Art Camera - This is a top down view of the work surface so that different art techniques can be shown to the audience without being obstructed.
- Art and Presenter - This is a complex view that combines the Art Camera with the Presenter Camera to help add back the personality of the presenter
Each one of these scenes is created in OBS and the transition timing tweaked to be pleasing. I’m not going to go into how to set that up since it may change from release to release. The OBS wiki should have the most updated information about setting up scenes and sources. But once you’ve gotten them setup you get something like this.

Now that we have these scenes we can either click on the scene to transition between them or setup shortcut keys. In an ideal world you could set up something like the MAX Falcon-8 and use that as way to switch between the scenes. For my father we used his TV as a second monitor and put OBS on that screen and then he can just use the mouse to switch between scenes without having to have OBS up on the main display that is used for presentations.
Outputting OBS to Zoom
Once you’ve got everything setup in OBS then you need to get the output sent somewhere. If you’re using a common streaming platform like Twitch, YouTube or Facebook then OBS can natively stream to those platforms and you just need to setup your streaming endpoints. But if you want to use OBS to output to Zoom, Google Meet or another service that just takes in a webcam output then you need install OBS Virtualcam. This allows OBS to create a virtual camera that can be used in your applications.
I recommend that you choose the auto start option for Virtualcam so that it’s available as soon as you start OBS. Also, don’t forget to start OBS before you start your meeting software so that it doesn’t try to take control of the other cameras first. The only big downside is that the Virtualcam plugin is only available for Windows currently. There are other options for Linux but the OSX option is not currently available.


